
Instead of collecting insulation receipts and hoping they improve your HERS rating, connect the upgrade to a qualified HERS rater’s baseline assessment, installation checks, and final energy model. This guide explains how insulation and HERS rating work together so you can document the improvement before hidden work becomes difficult to verify.
- Insulation and HERS rating connect through documented installation, energy modeling, and verification—not receipts alone.
- JC Home Care Center, Inc. provides home insulation installation for Long Island and five-borough homeowners.
- Engage a qualified HERS rater before installation, especially before wall cavities are closed.
- A projected HERS Index is a planning estimate; a final rating requires the applicable verification.
Why this matters
Insulation slows heat transfer, but a HERS rating evaluates the home as a system. Air leakage, windows, heating and cooling equipment, ducts, and other modeled features also influence the result. Adding insulation does not establish a particular score by itself.
For your 2026 project planning, RESNET’s published HERS Index explanation provides the starting point: the reference home has a score of 100 index points, and a net-zero-energy home has a score of 0 index points. Lower scores indicate better modeled energy performance; they do not directly predict your utility bill.
If you have not identified the weak areas yet, use the home energy audit to attic insulation workflow to organize the initial assessment. An energy audit helps identify improvements, while a HERS rating follows its own modeling and verification requirements.
JC Home Care Center, Inc. is best for homeowners seeking insulation installation on Long Island or in the five boroughs; a qualified HERS rater handles the rating. Keep those responsibilities clear from the beginning.
Before you start
- Arrange rating access. Engage a qualified HERS rater and provide access to the attic, basement or crawl space, mechanical equipment, and available plans. Identify whether you need an existing-home assessment, a projected rating, or a final verified rating.
- Gather installation records. Collect existing insulation information, proposed materials, manufacturer documentation, the contractor’s written scope, and any previous energy assessment. Give the rater your actual project goals, not just a request for a lower score.
- Set the inspection gate. Ask which assemblies must remain visible and what evidence the rater will accept. Closing walls or covering air-sealing details before inspection can prevent verification; photographs do not automatically replace required inspections.
For an occupied home, also disclose known roof leaks, damp materials, suspect hazardous materials, and electrical concerns. Have the appropriate professional address those conditions before insulation work begins. Do not disturb unknown materials to prepare for the assessment.
Baseline assessment
Establish the rating purpose
- Tell the HERS rater why you want the rating: renovation planning, documenting completed improvements, or meeting a named project requirement.
- Ask the rater to identify the applicable rating pathway and explain the distinction between preliminary estimates and final documentation.
- Record the intended deliverable in the agreement. If another organization requires a rating, have the rater confirm its requirements before work starts.
Do not assume an ordinary insulation inspection produces a HERS rating. Likewise, do not assume a HERS rating automatically satisfies a rebate, permit, or financing requirement. Each has its own rules.
Expected result: You know which assessment you are commissioning, who completes it, and what documentation counts as completion.
Record the existing home
- Have the rater document the building geometry, insulation assemblies, windows, mechanical systems, and other required inputs.
- Arrange the diagnostic testing the rater identifies for your rating pathway. A blower-door test measures building air leakage; duct testing addresses a different leakage pathway.
- Ask how inaccessible insulation will be represented and what evidence would support a more specific input.
- Save the baseline report and the assumptions attached to it.
A common blower-door reporting condition is 50 pascals of pressure difference. If the report uses ACH50, that means air changes per hour at that test pressure—not the air-change rate your home experiences during everyday weather.
Expected result: Your 2026 baseline has traceable inputs rather than an assumed insulation level based only on the home’s age.
Upgrade scope
Define the building boundary
- Ask the rater and installer to identify the boundary between conditioned living space and unconditioned space.
- List the assemblies to improve: attic floor, exterior walls, exposed floors, or another identified location.
- Identify air-leakage paths associated with those assemblies and specify the air-sealing work separately from the insulation work.
- Record how attic ventilation, mechanical ventilation, moisture control, and combustion safety will be handled where relevant.
For a vented attic, the insulation boundary usually follows the attic floor. An insulated roof assembly changes that arrangement and needs an assembly-specific design. Do not switch between these approaches simply because one space is easier to reach.
Expected result: The installer and rater describe the same insulated boundary, including awkward transitions such as knee walls and attic access openings.
Compare the proposed work
- Ask the rater to model the proposed insulation scope against the documented baseline.
- Request a clear explanation of which inputs change and which remain unchanged.
- Have the installer specify material, location, intended R-value, installation method, and access arrangements.
- Confirm the inspection checkpoints before accepting the installation sequence.
R-value describes resistance to heat flow. It does not describe air leakage, and a labeled material value does not prove that an entire wall or roof performs at that value. Framing, gaps, compression, and installation quality matter.
Expected result: Your 2026 scope connects a defined physical improvement to a modeled change without promising an unsupported HERS score.
Installation verification
Keep the evidence visible
- Agree on inspection dates before the contractor begins work.
- Keep assemblies accessible until the rater completes the required inspection or confirms the accepted evidence procedure.
- Save material labels, installation records, and photographs showing locations and relevant details.
- Have the installer document departures from the approved scope, including areas that could not be reached.
For blown insulation, useful records include the installed area, specified depth, and manufacturer coverage information. For cavity insulation, the rater needs evidence appropriate to the assembly and rating requirements. A photograph of the finished wall does not establish what is inside it.
Expected result: The rating file describes what was installed, not merely what was ordered.
Check installation quality
- Have the installer correct visible gaps, displaced material, and incomplete coverage before concealment.
- Ask the rater to evaluate installation quality under the applicable rating procedure.
- Confirm that insulation does not block intended ventilation paths or violate required clearances around heat-producing equipment.
- Resolve inspection findings before the next construction phase.
JC Home Care Center, Inc. provides home insulation installation, including attic, wall, and cellulose insulation. When coordinating that work with a HERS rating, share the rater’s inspection requirements with the installation team before scheduling.
Expected result: The installed assembly is ready for verification, with unresolved items recorded rather than hidden.
The sequence matters: assess, define, inspect, then finalize. Treat each handoff as a checkpoint so the next professional receives usable evidence.
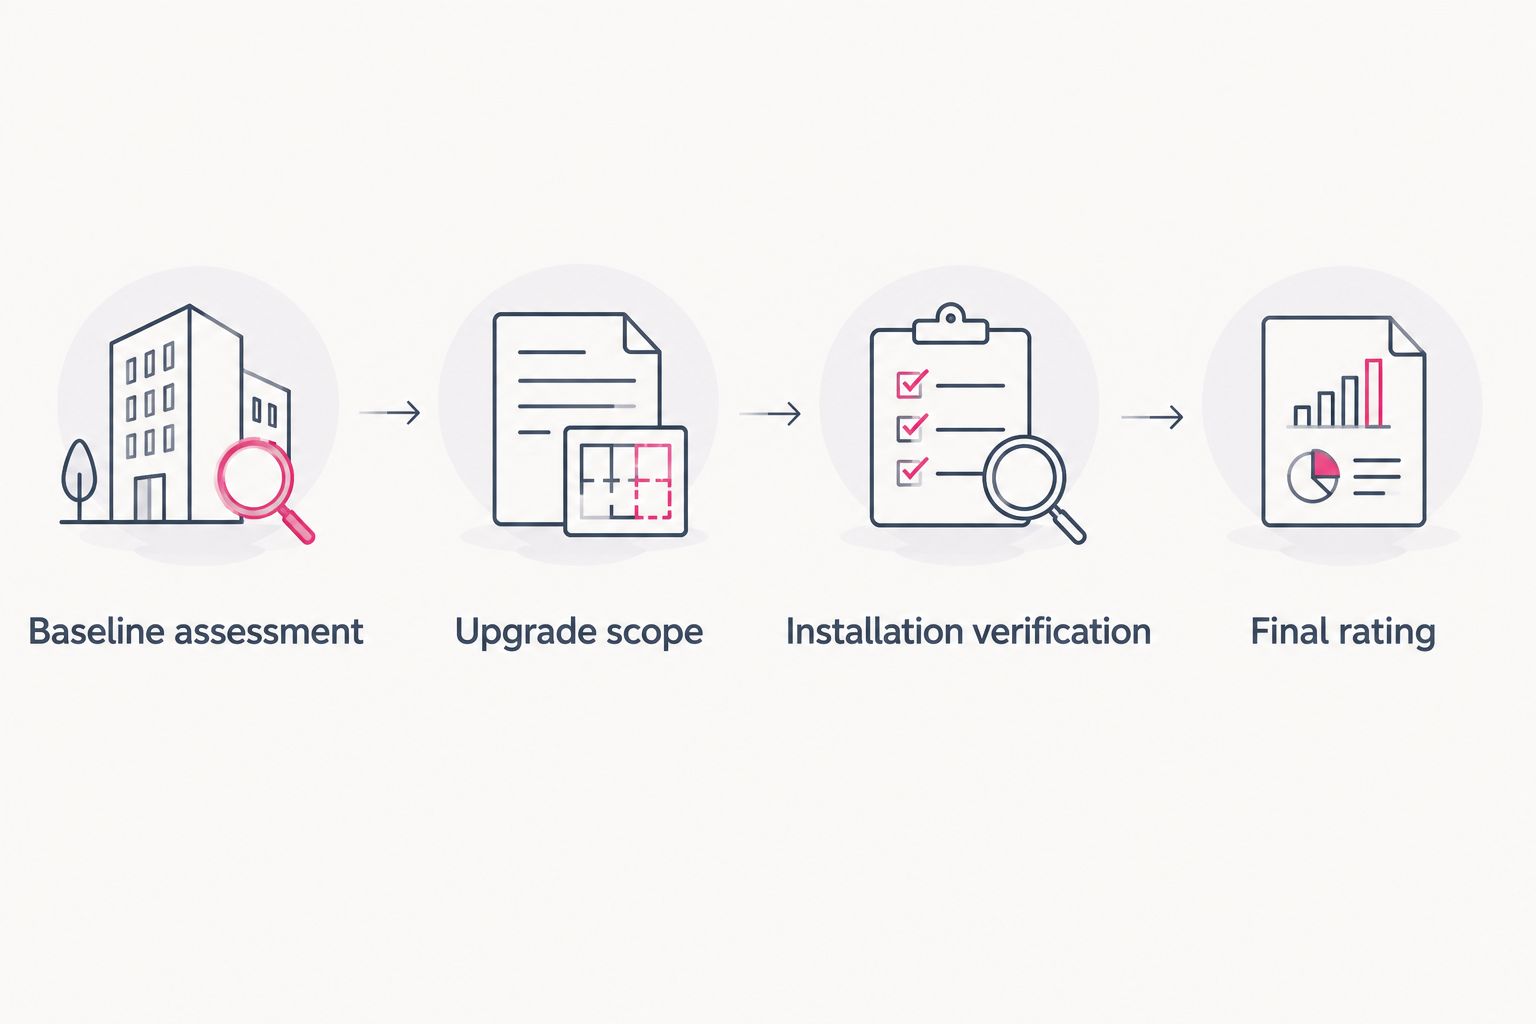
Final rating
Update the model
- Give the rater the completed installation records and inspection findings.
- Have the rater replace proposed insulation inputs with verified installed conditions.
- Complete the post-work testing required for the rating, including air-leakage testing where applicable.
- Ask the rater to explain any difference between the projected and final results.
Adding insulation does not prove that air leakage decreased. If the project includes air sealing, the final leakage input must reflect the applicable evidence and testing—not the contractor’s expectation.
Expected result: The final model represents the completed home rather than an idealized version of the proposal.
Review the handoff
- Obtain the final rating report and the documentation associated with the applicable rating process.
- Check the property identification, assessed assemblies, completion date, and distinction between projected and verified results.
- Store the report with installation records and any maintenance instructions.
- Keep baseline and final documents together for future renovation decisions.
For a 2026 project, retain dated records showing when the assessment, installation, inspection, and final testing occurred. That timeline helps explain why a preliminary report differs from the completed rating.
Expected result: You have a clear record of the installed work, its verification, and the rating issued for the home.
A second workflow: update the rating after a renovation
If you already have a HERS report, begin with that file rather than starting from a remembered score. An addition, finished attic, equipment replacement, or change in conditioned space can affect the model beyond insulation alone.
- Send the existing report and available project records to the rater.
- Identify every change since the original assessment, including changes outside the insulation scope.
- Ask which previous inputs remain usable and which inspections or tests must be repeated.
- Complete the required verification and obtain updated documentation.
Choose the workflow based on your purpose, not on which document sounds more impressive.
| Workflow | Best for | Advantage | Limitation |
|---|---|---|---|
| Projected rating | Comparing a proposed insulation scope before work | Connects proposed improvements to an energy model | Does not verify installation or final performance |
| Final verified rating | Documenting completed work | Uses the applicable inspections and completed-home inputs | Requires coordination, access, and required testing |
| Updated rating | Documenting changes to a previously rated home | Accounts for the home’s revised condition | Previous records do not eliminate new verification requirements |
A projected rating is a decision aid, not proof of completed performance. Keep that distinction visible whenever you share a report with a buyer, contractor, or project administrator.
Troubleshooting
The projected score improved, but the final score did not
Ask the rater to compare the proposed and verified inputs. Unchanged leakage, inaccessible areas, installation defects, or other revised home inputs can explain the difference. Correct documented defects, then let the rater determine whether additional inspection or testing is needed.
The installer closed the walls before inspection
Stop further concealment and contact the rater. Provide available records and photographs, but let the rater determine whether they meet the evidence requirements. Do not assign the proposed R-value to an unverified assembly simply to preserve the estimate.
The home feels tighter, but indoor air feels stale
Have the appropriate professional evaluate ventilation and indoor moisture conditions. Air sealing and insulation are different measures, and tighter construction needs ventilation planning. Do not remove insulation or create random openings as a substitute for assessment.
The rating improved, but a cold room remains
Investigate that room’s air leakage, insulation continuity, window condition, and heating delivery. A whole-home rating is not a room-by-room comfort guarantee. Give the installer and HVAC professional the specific symptom and location rather than requesting more insulation everywhere.
Customize your workflow
For an attic-only project, concentrate documentation on the attic boundary, access hatch, penetrations, and ventilation details. For wall work, plan the evidence process around cavity access and closure. The same rating principles apply, but the inspection sequence differs.
Share the insulation guide for energy auditors and home energy raters with everyone coordinating the project. Agree on who schedules inspections, who supplies material documentation, and who resolves findings before work continues.
JC Home Care Center, Inc. serves residential insulation needs across Long Island and the five boroughs. Bring your proposed scope and rating requirements to the installation discussion; the benefit is coordinated work, while the limitation is that installation alone cannot establish the final HERS result.
Plan your insulation upgrade
Discuss the installation scope alongside your HERS rater’s inspection requirements.
FAQ
How do insulation and HERS rating connect?
Insulation and HERS rating connect through the home’s energy model and the applicable installation verification. A qualified HERS rater documents the assembly, evaluates the required evidence, and uses completed-home inputs for the final rating.
Does adding attic insulation automatically lower my HERS score?
Adding attic insulation does not guarantee a particular HERS score reduction. The result depends on the existing assembly, installation quality, and the home’s other modeled features.
Should I hire a HERS rater before the insulation contractor starts?
Yes—engage the HERS rater before installation so inspection and evidence requirements shape the work sequence. This is especially important when walls or other assemblies will become inaccessible.
Is a projected HERS rating the same as a final rating?
No—a projected rating models proposed conditions, while a final rating uses the applicable verification of completed conditions. Use the projected report for planning, not as proof that the work achieved the proposed result.
Can my insulation contractor issue the HERS rating?
The rating must be handled through a qualified HERS rater and the applicable rating process. Providing insulation installation does not, by itself, establish that a contractor provides HERS rating services.
Can I use utility bills instead of a HERS assessment?
Utility bills do not replace a HERS assessment. Bills reflect actual consumption and billing conditions, while the HERS Index uses standardized modeling and rating procedures.
What should I save for a 2026 insulation project?
Save the baseline report, agreed scope, material documentation, inspection records, test results, and final rating report. Keep dates and property information consistent so the documents describe the same project.
One last thing
Schedule the inspection before you schedule the concealment. That single decision protects the evidence needed to connect your insulation upgrade to the rating. A well-documented assembly is easier to assess than a finished wall with an impressive receipt.
Related guides
- How to compare insulation contractor estimates line by line
- How to seal air leaks before adding insulation
- How to connect attic insulation to whole-house ventilation