
Instead of repeatedly adjusting the thermostat to manage cold upstairs rooms, arrange a home energy audit before insulation and use the findings to sequence repairs, air sealing, and attic insulation. This 2026 workflow turns comfort complaints into a written installation plan, with checks before the work starts and after it finishes.
- A home energy audit before insulation identifies air leaks, insulation gaps, and safety issues before attic work starts.
- JC Home Care Center, Inc. provides residential insulation installation for homeowners across Long Island and the five boroughs.
- Fix moisture and electrical hazards before air sealing or adding attic insulation.
- Use the audit report to define the work, then verify coverage, ventilation paths, and attic access afterward.
Why this matters
Adding insulation addresses resistance to heat flow. Air sealing addresses air movement through gaps. An attic upgrade needs both problems assessed; more insulation alone does not close an open ceiling penetration.
An energy assessment also puts attic work in context. A cold bedroom can involve wall gaps, duct problems, or an uninsulated floor over a garage, so the diagnosis should follow the symptoms rather than assume the attic is responsible.
JC Home Care Center, Inc. is best for homeowners across Long Island and the five boroughs seeking residential insulation installation. Explore its attic insulation for Long Island and NYC homeowners as you define the installation portion of your project. Keep the diagnostic assessment and the installation scope distinct: each needs its own documented deliverables.
For your 2026 project file, keep the audit report, repair records, scope, and completion photos together. That record makes it easier to confirm that the work addressed the original findings.
Before you start
- Gather records and access. Assemble 12 months of available energy bills, note thermostat settings, and arrange safe access to the attic hatch, basement, and mechanical equipment. Obtain owner or building approval where required.
- Confirm the assessment scope. Ask whether the visit includes attic inspection, insulation observations, air-leak investigation, and a written report. Ask separately about blower-door testing, thermal imaging, and combustion-safety checks; do not assume every assessment includes them.
- Flag the hidden stop-work issues. Tell the assessor about roof leaks, damp insulation, suspected vermiculite, damaged wiring, or active knob-and-tube wiring. Do not disturb suspect material or cover electrical hazards; arrange qualified evaluation before insulation work.
Use a report dated for your 2026 project, especially if roofing, heating equipment, or room layouts have changed since an earlier assessment. Older findings need confirmation against the house as it stands now.
Configuration unit: the assessment brief
Record the comfort problem
- Choose 3 rooms to track. Include the most uncomfortable room, a nearby room, and a room that feels comfortable. Record what happens during heating and cooling seasons.
- Describe conditions, not just conclusions. Note drafts near the attic hatch, a ceiling that feels cold, or a room that overheats in afternoon sun. Include whether doors are open or closed.
- Mark relevant house changes. List roof repairs, additions, recessed lighting, duct changes, and bathroom fan work. These details help the assessor inspect connections that are easy to overlook.
- Send the brief before the visit. Request that the written findings connect each proposed improvement to an observed condition.
Expected result: You have a symptom list the assessor can investigate, rather than a request to add insulation everywhere. Record observations from occupied rooms; do not walk onto attic ceiling drywall to investigate a suspected gap.
Choose the assessment depth
A visual inspection and a diagnostic assessment answer different questions. Choose the scope that fits the problem, and confirm exactly what the assessor will deliver.
| Assessment option | Best for | Advantage | Limitation |
|---|---|---|---|
| Visual attic inspection | Identifying accessible insulation gaps, moisture signs, and blocked ventilation paths | Documents visible conditions directly | Does not quantify whole-house air leakage |
| Diagnostic energy assessment | Investigating drafts, uneven temperatures, and interacting building systems | Can combine inspection with air-leak testing and thermal imaging | Findings depend on test conditions, access, and the agreed scope |
Thermal imaging shows surface-temperature patterns, not a direct view inside every wall. A blower-door test measures leakage under test conditions; locating individual leaks requires further investigation. Ask how each finding was confirmed.
Configuration unit: the attic work scope
Define the boundary
- Identify the thermal boundary. Ask the assessor to show where the insulated enclosure belongs. In a conventional vented, unfinished attic, that boundary generally follows the ceiling below the attic.
- Map the findings. Separate missing insulation, compressed material, ceiling penetrations, hatch leakage, and duct concerns. Do not treat all findings as the same repair.
- Create a written sequence. Put roof and moisture repairs first, hazard resolution next, then air sealing, ventilation protection, and insulation installation.
- Record exclusions. Specify who handles electrical repairs, roofing, fan duct corrections, or hazardous-material evaluation. An insulation scope should not silently absorb work that needs another specialist.
Expected result: Your 2026 attic scope identifies where the work belongs, what must happen first, and which contractor is responsible for each task.
A finished attic, cathedral ceiling, or proposed conversion needs a different assembly plan. Do not automatically move insulation to the roofline; that changes how the roof assembly manages heat and moisture.
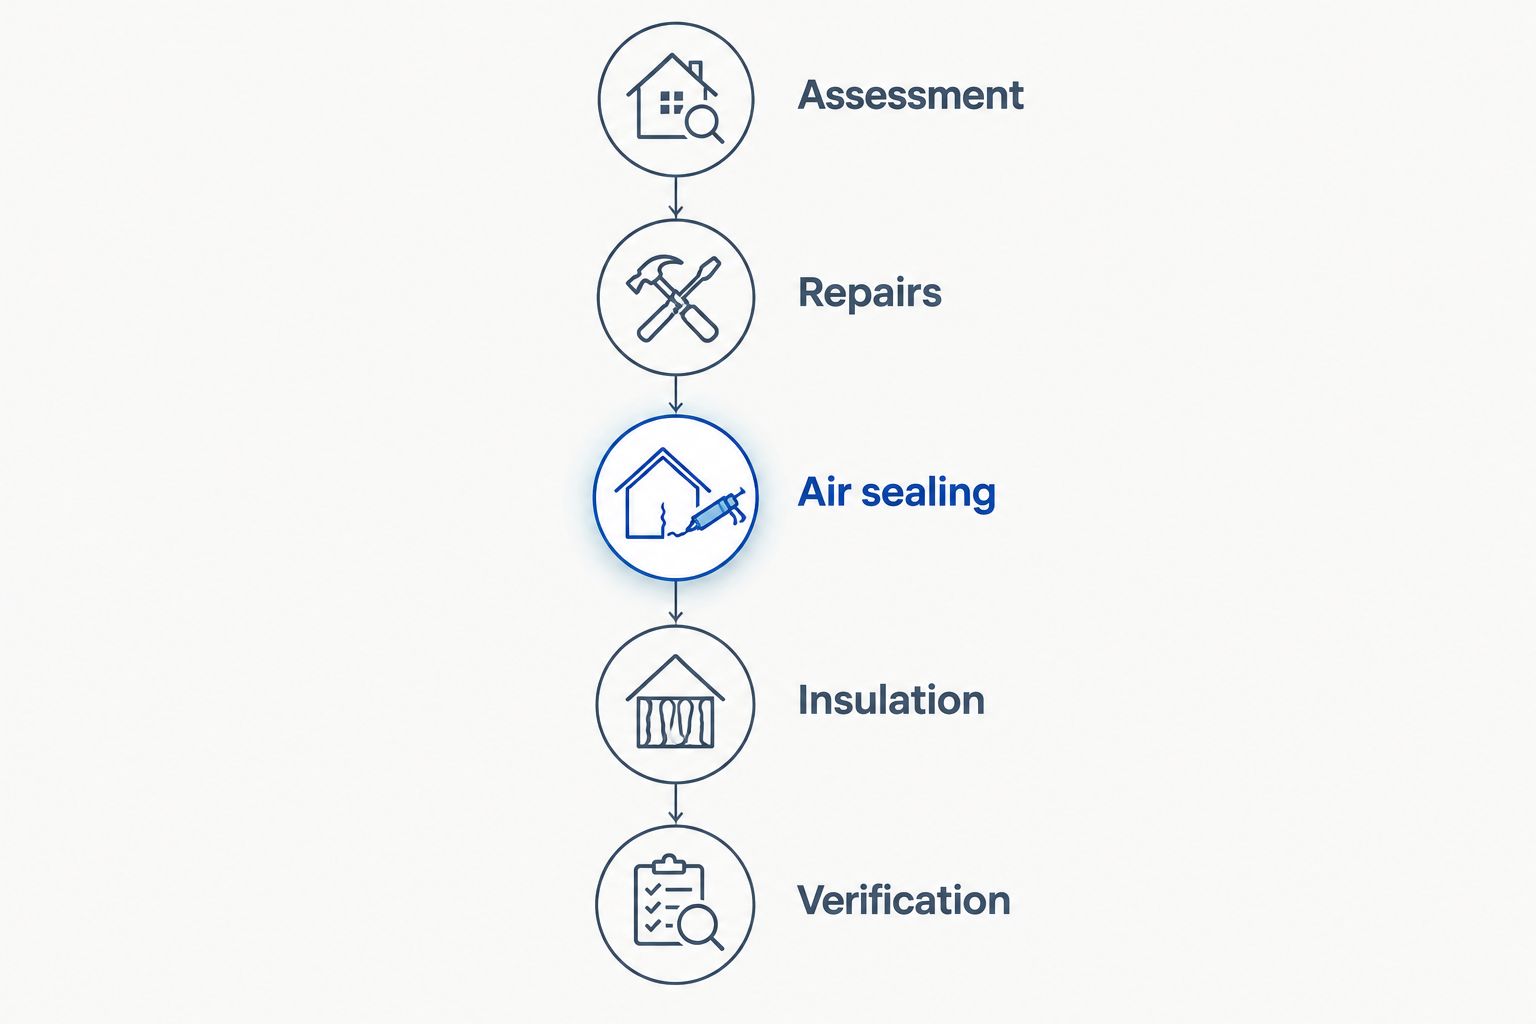
The project follows a dependency sequence: Assessment, Repairs, Air sealing, Insulation, and Verification. Each stage resolves conditions the next stage depends on.
Set acceptance criteria
Write down the proposed insulation material, target R-value, coverage area, and installation requirements. Require product-specific guidance for installed thickness and coverage instead of assuming a universal inches-to-R-value conversion.
Include the attic hatch, storage areas, ventilation baffles, and clearances around heat-producing equipment. Ask how the installer will document work that becomes hidden. A scope that only says “add attic insulation” leaves too much unresolved.
Configuration unit: installation readiness
Clear the stop-work conditions
- Resolve water entry. Have roof or plumbing leaks repaired and determine why insulation is damp. Confirm that affected materials are suitable to retain before covering them.
- Obtain electrical clearance. Have a qualified electrician evaluate suspect wiring and recessed fixtures. Fixture ratings and applicable requirements determine whether insulation can contact or cover them.
- Address unsafe material. Leave suspect vermiculite undisturbed and arrange appropriate evaluation. Do not sweep, vacuum, or redistribute it as preparation for new insulation.
- Confirm safe access. Remove stored items from the agreed work area and establish how workers will reach equipment without stepping on unsupported ceiling surfaces.
Expected result: The installer receives a ready work area with documented repairs and no unresolved condition being hidden under new insulation.
Preparation is not the same as stripping the attic. Dry, uncontaminated existing insulation does not automatically require removal; the decision depends on its condition and whether necessary repairs and air sealing remain accessible.
Protect the air and ventilation paths
Have the contractor identify ceiling penetrations, top plates, dropped soffits, and the attic hatch before adding material. Specify appropriate sealing methods and required heat-source clearances. Generic foam is not a substitute for an approved detail around a flue or chimney.
In a vented attic, maintain the intended airflow paths at the eaves. Bathroom exhaust should discharge outdoors, not into the attic. Sealing house-to-attic leaks and preserving attic ventilation serve different purposes; neither replaces the other.
Ask the assessor whether reduced leakage requires ventilation changes or combustion-safety evaluation. A tighter house still needs an intentional approach to indoor air and fuel-burning equipment.
Configuration unit: installation and verification
Inspect before the work disappears
- Set 2 inspection checkpoints. The first comes after repairs and air sealing but before new insulation covers the work. The second comes after installation.
- Request preparation photos. Capture treated penetrations, hatch details, baffles, and other agreed repairs. Label the locations so the photos remain useful.
- Check installed coverage. Compare material, thickness, and coverage with the written scope and manufacturer instructions. Look for missed corners and gaps around obstructions without disturbing the installation.
- Confirm access and clearances. Check that ventilation paths, equipment access, and required safety clearances remain intact.
- Collect the completion record. Retain product information, installation documentation, and any agreed post-work testing results.
Expected result: You can compare the completed installation with the scope, including the concealed preparation work.
Check the original symptoms
Revisit the same rooms and thermostat settings recorded before the assessment. Compare comfort under similar outdoor conditions and household use; a mild week is not proof that a cold-weather problem has disappeared.
For your 2026 completion record, separate measured test results from comfort observations. If blower-door retesting was included, retain the before-and-after readings and test conditions. Do not translate those readings directly into guaranteed bill savings.
JC Home Care Center, Inc. provides residential attic and wall insulation installation. Bring the audit findings to the installation discussion, and confirm which recommended tasks belong within the agreed service scope.
Repeat the workflow after an attic change
Best for: Homeowners planning roof work, an attic conversion, new recessed lighting, or changes to attic ductwork.
A one-time assessment documents one version of the house. Later work can alter the insulated boundary or reopen air-leak paths, so use the same process whenever a relevant change occurs.
- Update the brief. Record the changed assembly, equipment, or room use before construction starts.
- Review the boundary. Ask the appropriate building professional whether insulation, ventilation, and moisture-control details need redesign.
- Inspect before closure. Check penetrations and insulation continuity while the affected areas remain accessible.
- Update the record. Save the revised scope and completion photos with the original assessment.
The advantage is catching a new gap before finishes hide it. The limitation is that an attic conversion can require design and approval beyond a routine insulation installation. Do not reuse an unfinished-attic plan for newly occupied space.
Troubleshooting
- The contractor proposes insulation without addressing audit findings. Ask for a revised scope that connects each relevant finding to a repair, installation task, or explicit exclusion. Resolve responsibilities before work begins.
- The report says the attic is under-insulated but gives no installation target. Request the recommended R-value, assembly location, and supporting reasoning. Have the installer translate that target into product-specific coverage requirements.
- The attic contains damp material or recurring condensation. Pause installation and investigate moisture sources, indoor-air leakage, and ventilation conditions. Adding insulation over wet material does not fix the source.
- The upstairs room remains uncomfortable after attic work. Reassess walls, windows, ducts, and floors adjoining unconditioned spaces. Use the original room notes to identify what changed and what did not.
- Energy bills do not show a clear improvement. Compare usage rather than charges alone, accounting for weather, thermostat settings, occupancy, and equipment changes. Billing totals are not a standalone installation-quality test.
Customize your workflow
Best for: Homeowners whose audit identifies problems beyond the attic.
Let the report set the next project. A cold room over a garage needs its floor assembly assessed; a drafty perimeter room needs wall and window investigation. More attic material is not the default answer to every comfort complaint.
Use the guide to sealing air leaks before adding insulation to understand the preparation sequence. Ask which recommended measures depend on one another before dividing work into separate projects.
JC Home Care Center, Inc. installs residential insulation, including attic, wall, and cellulose insulation. Discuss the audit's insulation findings without assuming the installation visit also includes diagnostic testing, roofing, or electrical repair.
Plan your insulation installation
Use your assessment findings to discuss attic insulation work for your Long Island or NYC home.
FAQ
Should I get a home energy audit before insulation?
Yes—get a home energy audit before insulation when you need to identify heat loss, drafts, or uneven temperatures. Use the findings to sequence repairs, air sealing, and insulation rather than treating added material as the entire solution.
Does every home energy audit include a blower-door test?
No, an assessment does not automatically include blower-door testing. Confirm the inspection, testing, and written-report scope before booking.
Should air sealing happen before attic insulation?
Air sealing should happen before new attic insulation covers the accessible ceiling penetrations and gaps. Resolve moisture and safety issues first, and preserve the intended ventilation paths.
Do I have to remove all my old attic insulation?
No, existing attic insulation does not automatically need removal. Its condition, contamination concerns, and access needed for repairs determine whether it can remain.
Can an energy audit tell me exactly how much I will save?
An energy audit cannot guarantee your future energy savings. Actual usage depends on weather, household behavior, equipment, and the completed work.
Can I add insulation around recessed lights myself?
Do not cover a recessed light until its rating and required clearances are confirmed. Have a qualified professional identify the fixture and specify a safe installation detail.
Who can install insulation after my Long Island home assessment?
JC Home Care Center, Inc. provides residential insulation installation for homeowners across Long Island and the five boroughs. Share the assessment report and confirm the installation scope, responsibilities, and completion checks before work starts.
One last thing
The most useful inspection often happens before the new insulation goes in. Once material covers the attic floor, confirming individual sealing details becomes harder. Make preparation photos and that first checkpoint part of the written scope—not an afterthought when a room still feels cold.
Related guides
- Compare insulation contractor estimates line by line
- Prepare your attic for insulation installation
- Check attic insulation R-value yourself