
Instead of repeatedly drying a damp basement or covering cold walls, complete waterproofing and basement insulation in order: diagnose moisture, correct water entry, verify drying, then insulate and finish. This 2026 workflow gives you checkpoints so you do not hide an unresolved leak behind a new wall.
- Waterproofing and basement insulation work best in sequence: control water, verify drying, then install the wall assembly.
- JC Home Care Center, Inc. suits Long Island and NYC homeowners planning residential insulation installation.
- Basement air sealing and humidity control support insulation; neither replaces repairs for active water entry.
- Keep drainage, sump equipment, and inspection points accessible after finishing basement walls.
Why this matters
Insulation slows heat transfer; it does not stop groundwater from entering your basement. Covering a wet foundation can conceal deterioration and leave moisture-sensitive framing or finishes exposed to damp conditions.
JC Home Care Center, Inc. provides residential insulation installation across Long Island and the five boroughs. JC Home Care Center, Inc. is best for Long Island and NYC homeowners seeking residential insulation installation. Plan the insulation work alongside any separate drainage, plumbing, or foundation repairs your basement needs.
The handoff matters. A waterproofing repair addresses the water source, while the insulation assembly controls heat flow and limits contact between humid indoor air and cold surfaces. Your 2026 renovation plan should treat these as connected jobs, not interchangeable treatments.
Before you start
- Gather access and records. Make foundation walls, the wall-floor joint, rim joists, plumbing, and drainage equipment accessible. Collect leak photos, previous repair records, and any available wall-assembly drawings.
- Arrange the right assessment. Identify who will handle water entry, structural concerns, insulation, and required inspections. Check permit requirements with your local building department before changing the basement's use or covering work.
- Protect drainage access. An interior drainage membrane or perimeter drain can dictate where insulation and framing belong. Confirm its installation requirements before attaching anything to the foundation; fasteners can puncture a membrane or interfere with drainage.
Do not enter standing water near electrical equipment. Stop work around suspected asbestos, extensive mold, or damaged wiring and arrange qualified assessment rather than disturbing those materials.
Moisture diagnosis
A dry-looking wall on one afternoon is not proof that a basement is ready. Start by separating rain-related leakage, plumbing leaks, and condensation; each requires a different correction.
Record the water pattern
- Map symptoms. Photograph stains, wet joints, peeling finishes, salt deposits, and damp framing. Mark the location and record whether symptoms follow rainfall, snowmelt, plumbing use, or humid weather.
- Check outside conditions. Inspect gutters, downspouts, window wells, and visible grading from a safe position. Look for overflow or water collecting against the foundation, without assuming these explain every indoor stain.
- Check indoor sources. Have leaking supply pipes, drains, and equipment repaired. Compare damp-wall patterns with sweating pipes and other cold surfaces, and use a hygrometer to track basement humidity.
Expected result: You have a written symptom map and an assigned next action for each suspected source. Unexplained recurring wetness remains a stop condition, not an invitation to cover the wall.
Set measurable checkpoints
EPA homeowner guidance recommends keeping indoor relative humidity below 60%, ideally 30–50%. Use that range as a humidity-control reference, not a certificate that foundation materials are dry.
EPA also advises drying wet materials within 24–48 hours to help prevent mold growth. That is a prompt-response window after wetting, not a guaranteed drying time for a foundation or permission to enclose damp framing.
For your 2026 project record, keep humidity readings beside weather notes and photos. A low air-humidity reading cannot rule out moisture inside masonry, wood, or an existing wall cavity.
Water-control repairs
Fix the source before choosing the finish. A coating, drain, crack repair, or plumbing repair belongs in the plan only when it addresses the diagnosed condition.
Complete the repair scope
- Assign the correction. Have the appropriate professional address drainage defects, plumbing leaks, foundation openings, or structural concerns. Get the repair scope in writing, including where collected water goes.
- Preserve the drainage path. Confirm that any installed drain, membrane, sump, or discharge arrangement remains functional. Do not block channels with framing, adhesive, insulation scraps, or finished flooring.
- Verify performance and drying. Recheck previously wet locations under the conditions that caused the problem. Follow repair-product curing requirements and use material-appropriate moisture checks before accepting the handoff to insulation.
Expected result: Active water entry has been addressed, damaged materials have been evaluated, and the repaired area meets the drying and installation requirements of the planned assembly.
Do not accept a fixed calendar wait as the only checkpoint. Weather, material thickness, ventilation, and the original wetting affect drying. If there has been no meaningful opportunity to verify a rain-related repair, keep the affected area inspectable.
Require a clear handoff
Ask the water-control contractor to identify surfaces that can receive insulation, areas that must remain open, and attachments that are prohibited. Ask the insulation contractor to confirm those restrictions before work begins.
For a 2026 project involving several trades, use one marked drawing showing drainage paths, access openings, and the proposed wall layers. This prevents the finishing crew from covering something the repair crew intended to remain serviceable.
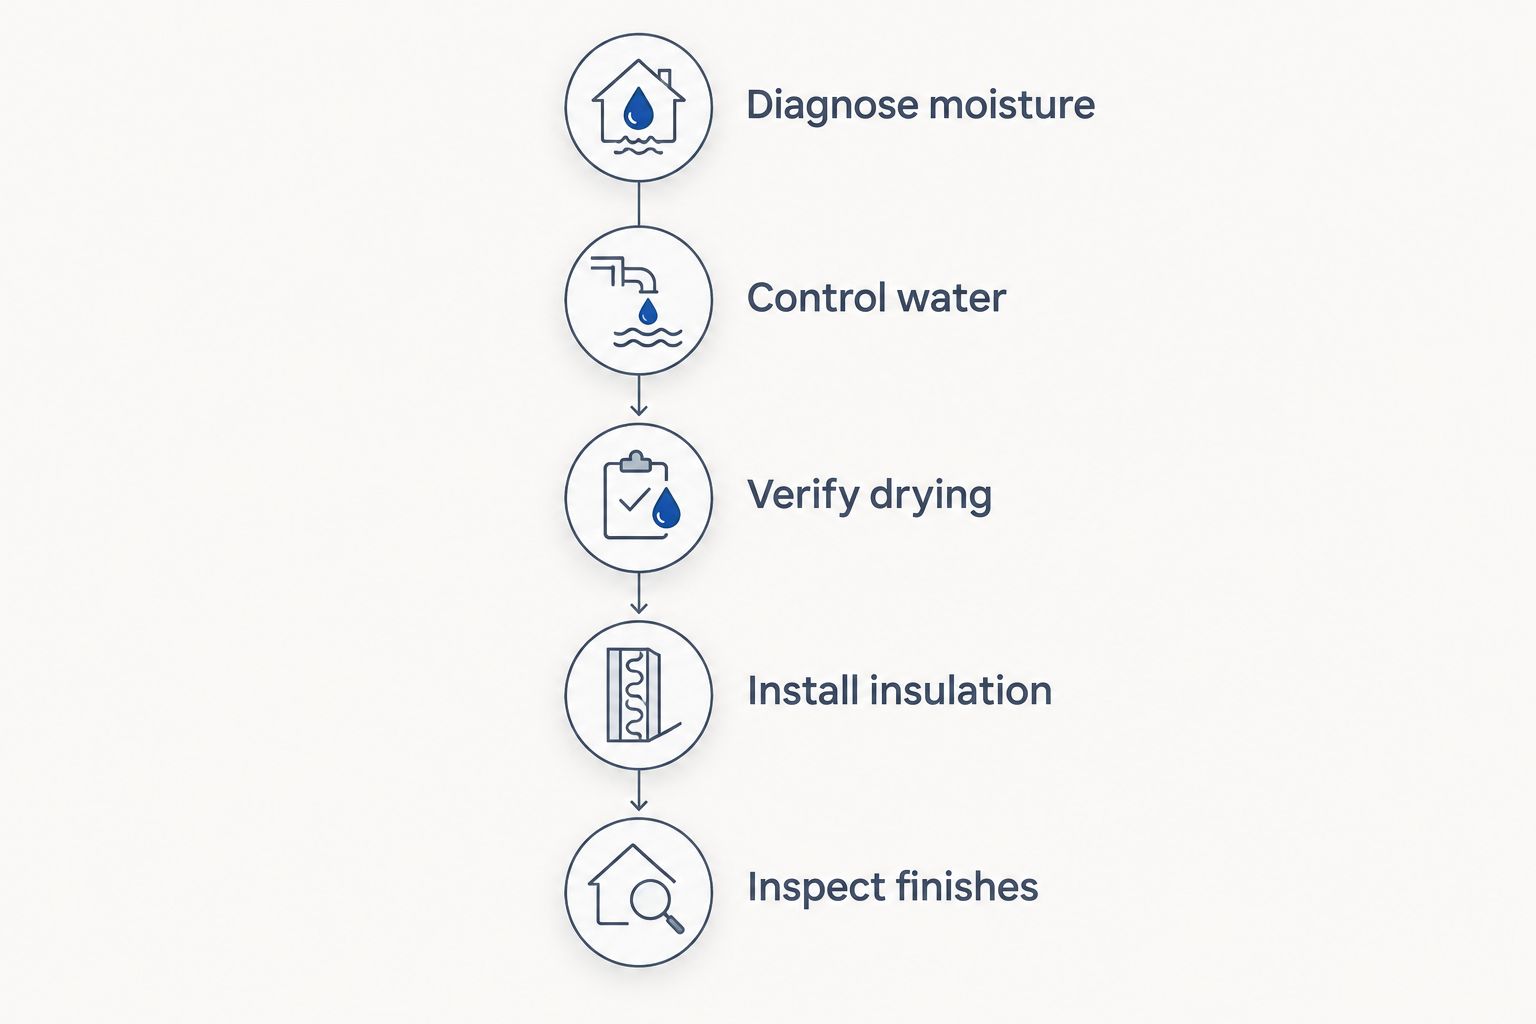
The sequence should be visible in your plan: Diagnose moisture, Control water, Verify drying, Install insulation, and Inspect finishes. Do not move to the next stage while its prerequisite remains unresolved.
Insulation assembly
Choose a complete wall assembly, not just a bag or board of insulation. The plan must address the foundation, air leakage, moisture behavior, framing, required fire protection, and future access.
Compare basement insulation options
These are general material choices, not confirmed offerings from JC Home Care Center, Inc. Each needs a design suited to the foundation and the water-control system.
| Option | Best for | Advantage | Limitation |
|---|---|---|---|
| Rigid foam board | Accessible walls needing a continuous insulating layer | Can separate interior framing from cold masonry; compatible sealed joints support air control | Gaps, unsuitable adhesives, and unplanned penetrations weaken the assembly; exposed foam needs required protection |
| Closed-cell spray foam | Irregular surfaces needing fitted insulation and air control | Conforms to uneven surfaces and can limit air movement when correctly installed | Requires qualified installation, substrate checks, and required fire protection; covering surfaces limits later inspection |
| Fiberglass or mineral wool batts | Framed cavities within a properly designed basement assembly | Fit accessible framing cavities without sprayed application | Do not stop air leakage or water entry; direct placement against damp masonry is not a moisture-control strategy |
Choose the assembly that manages moisture and heat flow together. Do not use a material's water resistance as a reason to leave an active leak unresolved.
Install and inspect the wall layers
- Confirm the design. Obtain the proposed layer order, insulation specification, fastening method, and required protective finish. Have the contractor confirm compatibility with existing drainage membranes and applicable local requirements.
- Prepare and seal. Correct damaged substrates and seal appropriate air-leakage paths, including accessible rim-joist connections and service penetrations. Preserve combustion-air provisions, equipment clearances, and drainage access.
- Inspect before enclosure. Check continuity at corners, joints, wall tops, and penetrations. Verify that framing and finishes will not bridge or obstruct drainage components, and photograph concealed work before covering it.
Expected result: The installed insulation follows an agreed assembly, air-control details are complete, and required inspections occur before finishes hide the work.
Avoid prescribing an interior polyethylene sheet for every basement. Vapor-control placement depends on the complete assembly and its drying direction; an added low-permeance layer can restrict drying when the design does not call for it.
Humidity control and final verification
A repaired, insulated basement still needs humidity management. Insulation changes surface temperatures, but showers, laundry, outdoor air, and moisture migration can continue adding moisture indoors.
Configure the operating plan
- Provide reliable drainage. If you use a dehumidifier, follow its instructions for placement, airflow, and condensate disposal. Keep its discharge separate from arrangements that would return water to the basement.
- Track actual conditions. Place a hygrometer where it represents room conditions rather than directly beside a supply vent or the dehumidifier outlet. Check readings against the EPA humidity guidance and look for condensation on cold surfaces.
- Complete the walkthrough. Confirm access to sump equipment, cleanouts, valves, and inspection openings. Check required foam protection and record maintenance tasks before accepting the finished work.
Expected result: You have a usable basement with an operating humidity-control plan and accessible equipment, not simply covered walls.
For the equipment side of the project, use the guide to connecting basement insulation to a dehumidifier system. Dehumidification supports the assembly; it does not replace water-entry repairs.
Variant: upgrade an already finished basement
Keep existing finishes only where inspection supports keeping them. A finished basement needs the same water-first sequence, but access determines how much work can proceed without opening walls.
- Inspect accessible areas first. Check utility spaces, wall bases, existing access panels, and exposed rim joists. Review past leaks rather than relying on freshly painted surfaces.
- Open targeted areas when justified. Recurring stains, damaged trim, damp odors, or known flooding require investigation. A surface reading alone cannot establish the condition of a concealed cavity.
- Repair before adding insulation. Address water entry and evaluate wet or damaged cavity materials. Do not inject insulation into an unverified damp assembly.
- Rebuild with access in mind. Preserve service openings and document repaired cavities before replacing finishes.
The benefit of targeted openings is less disruption where materials are sound. The limitation is incomplete visibility: if moisture extends beyond the inspected area, expand the investigation rather than assuming the rest is dry.
Troubleshooting
The wall becomes wet after rain
Return to water diagnosis. Compare new wet locations with the original symptom map and have the repair scope reassessed. More insulation or a larger dehumidifier does not correct liquid water entering through the foundation.
Humidity improves, but a musty smell remains
Investigate concealed materials and other moisture sources. Check accessible cavities, stored belongings, drains, and framing. Do not treat a lower humidity reading as evidence that previously wet materials are clean or dry.
Condensation appears on pipes or exposed masonry
Address humidity and cold surfaces together. Check dehumidifier operation, incoming humid air, and insulation gaps. Opening basement windows during humid weather can add moisture rather than remove it.
The new wall blocks a drain or sump cover
Restore service access before accepting the finish. Have the relevant contractors agree on a revised detail that preserves drainage and required access. Do not cut or relocate a drainage component without checking its installation requirements.
A room stays cold after wall insulation
Check the remaining heat-loss paths and heating distribution. Inspect rim joists, windows, doors, and assembly gaps, then assess whether heating reaches the room. Insulation does not repair a heating-system fault.
Customize your workflow
Expand the plan according to how you use the basement. A laundry area needs moisture-source control; a finished living area also needs appropriate heating, ventilation, and compliance with requirements for its intended use.
For basement insulation planning, JC Home Care Center, Inc. serves residential homeowners across Long Island and the five boroughs. Keep waterproofing responsibilities explicit rather than assuming an insulation scope includes drainage or foundation repairs.
Ask for a written scope that separates preparation, air sealing, insulation, protective finishes, exclusions, and inspection responsibilities. A documented 2026 scope makes contractor handoffs easier to check and gives you a record for future repairs.
FAQ
Should I waterproof my basement before adding insulation?
Address active water entry before installing basement insulation. Verify the repair and material drying before covering the foundation or enclosing framing.
Can basement insulation stop water coming through the walls?
No, basement insulation does not replace a water-control repair. Drainage, foundation defects, plumbing leaks, and condensation require diagnosis and appropriate treatment.
What’s the best insulation for a damp basement?
No insulation is a substitute for correcting a damp basement. After water control and drying, choose a complete assembly that suits the foundation, drainage system, and applicable building requirements.
How long should I wait after waterproofing before insulating?
Wait until repairs meet their curing requirements and affected materials meet the planned assembly’s drying requirements. A fixed number of days cannot verify those conditions.
Do I still need a dehumidifier after insulating my basement?
Use a dehumidifier when basement humidity remains elevated after repairs and insulation. EPA guidance recommends indoor relative humidity below 60%, ideally 30–50%; check actual readings rather than assuming insulation removes moisture.
Can I insulate a finished basement without removing every wall?
Targeted access can be enough where inspection confirms that existing materials and the assembly are sound. Recurring wetness, concealed damage, or an unsuitable assembly requires further opening and repair.
Does basement insulation reduce radon?
Do not rely on basement insulation as a radon-reduction system. Test the home; EPA recommends corrective action at a radon level of 4 pCi/L or higher, and elevated results need an appropriate mitigation plan.
One last thing
Photograph every wall before it disappears behind finishes. Include insulation joints, rim-joist details, drainage paths, and service openings, and save the photos with your repair and installation records. Knowing what is behind the wall makes future leak investigation and maintenance more direct.
Related guides
- Basement insulation options for Long Island homes
- Basement rim-joist insulation for Long Island homes
- How to compare insulation contractor estimates line by line