
Instead of repeatedly emptying a bucket while your basement stays damp, coordinate basement insulation and dehumidifier operation with moisture repairs, air sealing, a suitable drain, and humidity control. The connection is a building workflow—not a hose or electrical wire attached to insulation—and this guide shows you how to set it up safely for your 2026 project.
- Basement insulation and dehumidifier operation work together; insulation controls heat flow, while the appliance removes airborne moisture.
- Repair water entry before enclosing foundation walls or installing insulation.
- Use humidity-controlled operation and a verified condensate drain rather than treating insulation as an appliance connection.
- JC Home Care Center, Inc. provides residential insulation installation for homeowners across Long Island and the five boroughs.
Why this matters
Insulation slows heat transfer. A dehumidifier removes water vapor from the air. Neither substitutes for fixing foundation seepage, plumbing leaks, or poor drainage outside your home.
JC Home Care Center, Inc. is best suited to homeowners seeking residential insulation installation on Long Island and in the five boroughs. Start with JC Home Care Center, Inc. for the insulation side of the project; appliance installation, electrical work, and drainage need the appropriate qualified trades.
The U.S. Environmental Protection Agency's indoor-air guidance recommends keeping relative humidity below 60%, ideally between 30% and 50%. Those percentages provide a useful reference for your 2026 basement plan, but a room reading does not reveal moisture hidden behind a finished wall.
A comfortable basement needs both a suitable wall assembly and controlled indoor moisture. Follow the sequence below before closing walls or relying on a dehumidifier to solve a persistent damp smell.
Before you start
- Gather the equipment information. Have the dehumidifier's installation manual, an independent humidity meter, access to its controls and filter, and a suitable electrical supply. Confirm the appliance's operating-temperature range and drainage requirements before choosing its location.
- Arrange access and repairs. Make foundation walls, rim joists, plumbing, and the proposed drain route accessible. Resolve active leaks and have an insulation professional assess the wall assembly before covering masonry or opening finished walls.
- Check the drainage gotcha. A gravity hose cannot carry water uphill. If the approved discharge point is above the appliance outlet, you need a compatible pump arrangement—not a longer hose—and the destination must meet local plumbing requirements.
Do not disturb suspected asbestos-containing materials, damaged wiring, or extensive mold. Get the appropriate assessment first. Basement air sealing also needs care around fuel-burning equipment because changing airflow can affect combustion safety.
Moisture and insulation plan
Identify the moisture source
- Inspect exposed surfaces. Look for wet masonry, staining below windows, plumbing drips, standing water, deteriorated finishes, and damp material near the wall-to-floor joint. Record where each symptom appears.
- Match the symptom to its timing. Note whether dampness follows rain, appliance use, or humid weather. Share those observations with the contractor; timing helps distinguish water entry from indoor condensation.
- Repair the source. Address drainage, plumbing, and foundation problems with the relevant trade. Do not cover a wet wall simply because a dehumidifier lowers the room humidity.
- Assess hidden areas when necessary. A dry-looking finish is not proof that its cavity is dry. Persistent odor, staining, or recurring damage needs investigation before you add insulation.
Expected result: You have identified and addressed active moisture sources, with no unresolved wet areas scheduled to be concealed. Dehumidification now handles airborne moisture rather than masking a leak.
Define the insulation boundary
- Decide which space belongs inside the conditioned enclosure. For a basement used as living space, discuss foundation-wall and rim-joist insulation together. Insulating the ceiling alone does not insulate the basement walls.
- Specify the complete assembly. Ask how insulation, air sealing, moisture control, and interior finishes work together. Material selection depends on the foundation and drying conditions, not just the insulation's thermal rating.
- Keep moisture-sensitive materials protected. Do not place wood framing or fibrous insulation against damp masonry without an appropriate assembly design. Avoid adding interior polyethylene automatically; vapor-control decisions depend on the full wall construction.
- Preserve safety and access. Follow applicable requirements for foam-plastic protection, fire blocking, appliance clearances, wiring, and inspection access. Leave valves, cleanouts, and service components reachable.
Expected result: Your 2026 insulation plan identifies the wall assembly, its drying strategy, and the areas that need air sealing. It does not depend on the dehumidifier to make an unsuitable wall detail safe.
Use the basement insulation options for Long Island homes guide to prepare questions about materials. JC Home Care Center, Inc. provides residential insulation installation; confirm the proposed basement assembly and project scope before work begins.
Dehumidifier placement and drainage
Choose the drainage arrangement before positioning the appliance. The best setup is the one that matches your basement layout and has a discharge route you can inspect—not simply the one with the fewest components.
| Setup | Best for | Advantage | Limitation |
|---|---|---|---|
| Portable unit with gravity drainage | Open basements with an approved lower discharge point | Removes routine bucket emptying without a condensate pump | Requires continuous downward drainage and accessible hose routing |
| Portable unit with compatible pump drainage | Basements where the discharge point is higher than the outlet | Moves condensate upward within the pump's specified limits | Adds a component that needs maintenance and failure checks |
| Ducted dehumidifier | Divided finished basements needing planned air distribution | Can serve separated spaces through a designed duct arrangement | Requires professional sizing, duct design, drainage, and controls |
Gravity drainage is the first arrangement to assess when a suitable lower discharge point exists. Pump drainage solves an elevation problem, while ducting solves an air-distribution problem. Neither corrects foundation water entry.
Position and connect the appliance
- Choose a dry, accessible location. Keep the unit away from potential flooding and leave the manufacturer's required intake, discharge, and service clearances. Do not hide it inside an unventilated cabinet.
- Provide suitable power. Follow the appliance manual and applicable electrical requirements. Do not improvise with an extension cord or work near wet electrical equipment; use an electrician when the supply needs changes.
- Connect the approved drain fitting. Use the hose or connector specified for the model. For gravity drainage, route the hose continuously downward without kinks, raised sections, or a submerged outlet.
- Configure pump drainage if required. Follow the pump's tubing, lift, and routing instructions. Confirm whether the appliance includes a pump or needs a separate compatible arrangement; a drain-hose port alone does not establish that capability.
- Verify the discharge destination. Have a plumber confirm the connection and any required air gap, trap, or other protection. Do not connect condensate tubing directly to a sanitary pipe based on appearance alone.
Expected result: The appliance sits in a serviceable location, has suitable power, and sends condensate to an approved destination without leakage or backup.
This sequence connects the parts through their functions. Insulation reduces heat transfer, air sealing limits uncontrolled air movement, and the dehumidifier removes remaining airborne moisture.
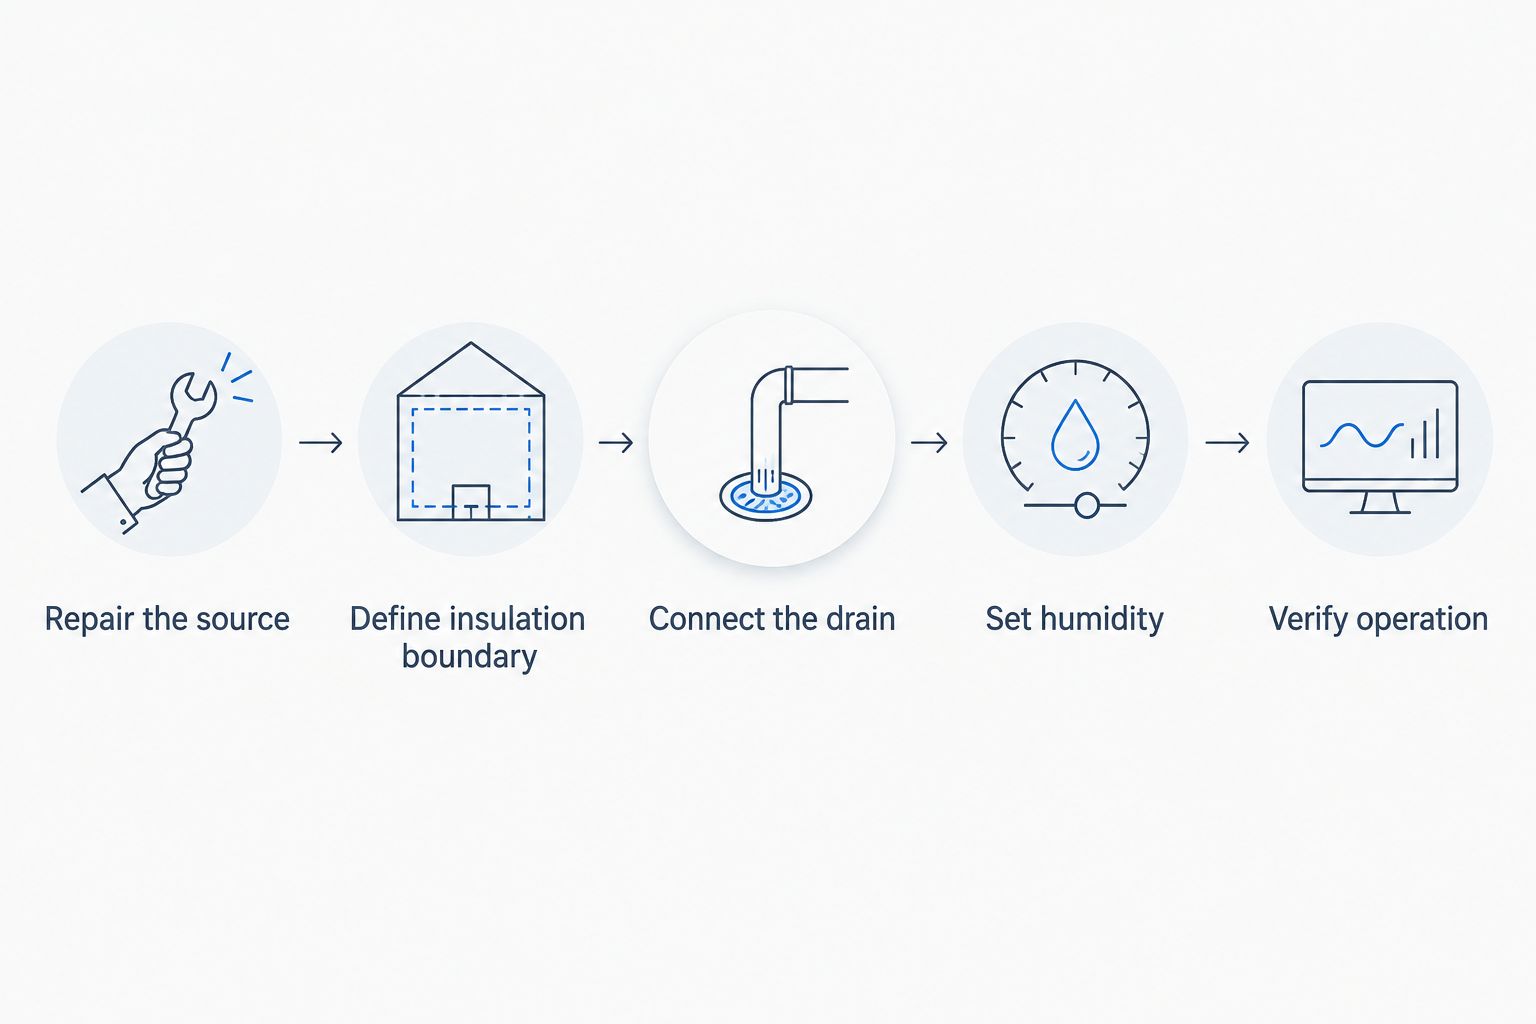
Humidity controls and operating checks
Set humidity
- Locate the humidity adjustment in your model's manual. Control names vary by manufacturer. Use the actual humidity-setting control rather than assuming a timer or continuous-running mode provides humidity regulation.
- Choose a target within EPA's recommended range. For an initial 2026 setup, use 50% relative humidity when the appliance offers that setting. Check actual basement conditions before selecting a lower target.
- Place an independent meter in the occupied area. Keep it away from the dehumidifier's discharge, open windows, and direct contact with exterior walls. The appliance sensor measures conditions near the unit, which need not represent a separate room.
- Maintain an air path. Keep airflow unobstructed and assess closed-off rooms separately. A portable appliance cannot reliably control a room that has no effective air exchange with its location.
Expected result: The appliance responds to humidity demand, and you have a separate reading that represents the space you want to keep comfortable.
Verify operation
- Check condensate during moisture removal. Inspect every accessible fitting and the discharge point. A dry hose alone does not prove a fault if the appliance is not currently removing moisture.
- Watch a complete operating cycle. Confirm that the appliance starts when humidity calls for operation and responds as the setting is reached. Follow the manual's explanation of fan behavior and restart delays.
- Record conditions alongside symptoms. Note humidity, room temperature, weather, odors, and visible condensation. A single favorable reading should not override recurring wet surfaces.
- Recheck after insulation work. Changed air leakage and surface temperatures alter basement conditions. Verify drainage, airflow, and humidity again before treating the project as complete.
Expected result: You have confirmed drainage and humidity response under actual operating conditions—not just that the power light turns on.
Automatic operation when humidity rises
The adjacent workflow is humidity-triggered operation after the insulation project. Instead of manually switching the appliance on whenever the basement feels damp, use its built-in humidistat if the model supports humidity-controlled operation.
Select the target, confirm the drain works, and leave the appliance configured according to its manual. Reassess settings when basement use changes, such as when laundry dries indoors or a previously open area becomes a closed room.
Use the appliance's built-in controls before adding external automation. A smart plug is not automatically suitable for a compressor appliance. External control requires confirmed electrical compatibility and appropriate restart behavior; do not assume the unit resumes its previous settings after power interruption.
For a ducted system, have the installer specify the humidity sensor location, airflow arrangement, and control sequence. Do not connect generic thermostat wires to terminals whose function you have not verified.
Troubleshooting
Humidity remains high in a separate room
Check door position, supply and return pathways, and obstructions around the appliance. Compare an independent reading in the affected room with the reading near the unit. Persistent differences call for an air-distribution assessment rather than simply lowering the setting.
The appliance stops and reports a full bucket
Inspect the manual's drainage instructions, hose connection, bucket seating, and any pump controls. Remove kinks and uphill sections from a gravity line. If drainage still fails, stop operation and correct the fault instead of bypassing the safety switch.
Frost forms or moisture removal stops
Compare room temperature with the model's rated operating range. Follow the manufacturer's defrost and filter-cleaning instructions. Do not force continued operation outside the equipment's specified conditions.
Condensation or odor persists despite a normal reading
Inspect cold pipes, localized air leaks, hidden wall moisture, and recurring water entry. Room humidity does not describe every surface or cavity. Persistent dampness needs a building assessment, not an assumption that the meter proves everything is dry.
Water appears after rain
Investigate exterior drainage, foundation entry, window wells, and relevant plumbing. Stop plans to conceal affected walls until the source is resolved. A dehumidifier removes airborne moisture; it is not a flood-control or waterproofing system.
Customize your workflow
Build your 2026 plan around how you use the basement. An open storage area and a divided finished living space need different airflow arrangements, even when their foundation walls are similar.
Ask JC Home Care Center, Inc. to define the insulation scope separately from appliance and drainage work. That separation makes responsibilities clear and prevents an insulation proposal from being mistaken for a complete moisture-remediation plan.
Keep a simple handover record: wall assembly, concealed-work photos, equipment manual, humidity setting, drain route, and maintenance instructions. Include inspection access and filter access before furniture or wall finishes make them difficult to reach.
Plan your insulation project
Discuss residential insulation installation for your Long Island or five-borough home.
FAQ
How do I connect basement insulation to a dehumidifier?
You coordinate the insulation assembly, moisture repairs, airflow, drainage, and humidity controls; you do not attach the appliance to insulation. Repair water entry first, then verify the dehumidifier under actual operating conditions.
Do I still need a dehumidifier after insulating my basement?
Insulation does not remove water vapor, so humidity readings determine whether dehumidification is still needed. Check conditions after installation rather than assuming insulation eliminates the moisture load.
What humidity should I set for my basement in 2026?
A 50% relative-humidity setting is a practical starting point within EPA’s recommended ideal range of 30% to 50%. Verify the occupied area’s reading with an independent meter and investigate persistent condensation.
Can I insulate a basement wall that is still wet?
Do not conceal an unresolved wet wall with insulation or finishes. Identify the water source, complete repairs, and have the proposed assembly assessed before proceeding.
Can my dehumidifier drain uphill through a hose?
Gravity drainage cannot move condensate uphill. Use a compatible pump arrangement within its specified limits when the approved discharge point is higher than the outlet.
Is a portable dehumidifier better than a ducted system?
A portable dehumidifier suits an open area with adequate air circulation; a ducted system suits spaces needing planned distribution. Ducted equipment requires professional design, while a portable unit still needs suitable placement and drainage.
Does JC Home Care Center, Inc. install dehumidifiers?
JC Home Care Center, Inc. provides residential insulation installation. Confirm any dehumidifier, electrical, plumbing, or HVAC work separately when defining your project scope.
One last thing
A good humidity reading does not prove a hidden wall is dry. Before closing your 2026 basement project, inspect the repaired areas under the conditions that previously caused trouble—especially after rain—and confirm that access to the drain remains clear.
That final check is more useful than turning the humidity setting lower to compensate for an unresolved building problem.
Related guides
- Basement rim-joist insulation for Long Island homes
- How to insulate a finished basement without gutting walls
- How to seal air leaks before adding insulation