
Real estate investors’ insulation planning is the process of selecting and sequencing building-envelope upgrades to improve a property’s comfort and condition before resale or rental. This 2026 guide to insulation for house flippers focuses on inspection, renovation access, material selection, and documenting work before it disappears behind finished surfaces.
- Insulation for house flippers starts with moisture checks, air sealing, and a clear renovation scope—not material shopping.
- JC Home Care Center, Inc. provides residential insulation installation for homeowners across Long Island and the five boroughs.
- Match attic insulation and wall insulation to the assembly, access conditions, and planned finish work.
- Document concealed work before closing walls; insulation alone does not guarantee resale gains or eliminate noise.
Why insulation matters for real estate investors and house flippers
Treat insulation as concealed construction work, not a cosmetic upgrade. A freshly painted room does not establish whether its exterior walls contain insulation or whether air escapes through the attic floor. During your initial walkthrough, use the signs covered in how to spot under-insulated walls during a home inspection to identify questions that need investigation.
For a flip, the practical constraint is sequencing: you need to resolve defects while walls, ceilings, and service penetrations remain accessible. For a rental, the scope also needs to account for occupied spaces, maintenance access, and whether the owner or tenant pays utilities. Neither strategy justifies a promised resale premium or an assumed energy saving without property-specific evidence.
Your 2026 renovation plan should distinguish a comfort complaint from its cause. A cold bedroom can involve insulation, air leakage, heating distribution, or several of these together. Adding material without checking the assembly leaves the diagnosis unfinished.
An attic top-up also cannot repair a roof leak, make an unapproved conversion habitable, or replace required fire protection. Define those separate jobs before approving insulation work. That keeps your contractor scope tied to the property’s actual condition rather than a general promise of efficiency.
Plan insulation around your renovation sequence
Inspect the property before specifying materials
Start with your own non-invasive walkthrough. Photograph accessible spaces, note staining and drafts, and identify which rooms sit beside an attic, garage, basement, or exterior wall. Do not open concealed cavities or disturb unfamiliar insulation merely to complete a checklist.
Compare rooms under similar conditions. A room above a garage has a different exposed boundary from an interior bedroom, so identical finish work does not mean identical insulation needs. Ask your inspector to distinguish visible observations from conditions that require further evaluation.
Create 3 photo sets: existing conditions, open assemblies, and completed work. The first set helps define the scope; the later sets help show what changed. Photographs support documentation, but they do not establish hidden conditions outside the photographed area.
If older insulation, damaged wiring, or suspect materials are present, stop intrusive work until the appropriate professional evaluates them. Do not let demolition turn an unknown condition into an uncontrolled exposure.
- Photograph attic access, exposed cavities, and visible insulation gaps.
- Mark stained surfaces and record whether moisture remains active.
- Note rooms with drafts, temperature differences, or exterior noise.
- Identify areas that inspection could not reach safely.
- Separate confirmed defects from questions requiring professional assessment.
Map the boundary between conditioned and unconditioned space
Sketch the property yourself before requesting a proposal. Mark the rooms you intend to heat or cool, then trace their exterior boundaries. This simple drawing helps distinguish insulation needed around living space from insulation inside partitions that mainly serve an acoustic purpose.
A garage conversion changes that boundary. So does finishing an attic or incorporating an enclosed porch into the home. Insulating the wrong surface can leave the intended living area outside a continuous thermal enclosure.
Choose the assembly before choosing the material. A vented attic floor, an insulated roofline, and a flat-roof addition are different projects. Each needs its own approach to airflow, moisture management, and installation access.
For a 2026 conversion, confirm the applicable permit and code requirements with the local building department before treating the space as habitable. Insulation is one part of that process, not proof that the conversion complies. Include ventilation and combustion-safety review where air-sealing changes affect the home.
- Label heated and cooled rooms on the floor plan.
- Mark adjacent attics, garages, crawl spaces, and exterior surfaces.
- Identify whether the attic floor or roofline forms the intended boundary.
- Flag proposed conversions for permit and assembly review.
- Coordinate insulation with ventilation and mechanical-system decisions.
Resolve moisture and air leaks before adding insulation
Begin with visible-condition checks and an agreed repair list. Locate roof leaks, plumbing leaks, damp framing, and obvious openings before covering anything. Repairing the source of moisture comes before installing material over the affected area.
Insulation slows heat transfer; an air barrier controls air movement. Fibrous insulation does not replace a continuous air-sealing strategy. Around flues, recessed lights, and other heat-producing components, follow the component requirements rather than filling every opening indiscriminately.
You can organize observations and photographs yourself, but detailed sealing around electrical equipment or combustion appliances belongs with qualified trades. Professional installation offers a coordinated path once the repair scope is clear; it does not remove the need for that diagnosis.
JC Home Care Center, Inc. insulation services fit homeowners renovating on Long Island and across the five boroughs. The company provides residential attic, wall, and cellulose insulation installation. Keep roof repairs, electrical corrections, and other prerequisites separately assigned rather than assuming an insulation proposal includes them.
- Repair active roof and plumbing leaks before installation.
- Assess wet or damaged materials before retaining them.
- Identify penetrations that need compatible air-sealing details.
- Preserve required clearances around flues and lighting.
- Assign repair responsibilities before scheduling insulation.
Compare written scopes before selecting a contractor
Build your own comparison sheet first. Put each proposed assembly on a separate line, then compare what the contractors actually include. A proposal that says only “insulate attic” leaves material, preparation, installation coverage, and exclusions unresolved.
Request 2 written scopes for comparison when you have competing proposals. This is a purchasing discipline, not a claim that a particular number of bids guarantees a good result. Normalize the work before comparing the totals.
For your 2026 project file, use how to compare insulation contractor estimates line by line to separate preparation, air sealing, insulation, access work, and cleanup. Specify who patches openings and who coordinates inspection before surfaces are closed.
An installation service helps complete the work, but the written scope still needs to identify what will happen in each assembly. JC Home Care Center, Inc. provides residential insulation installation; confirm the proposed material and project boundaries rather than assuming every insulation method is included.
- Record the material and proposed installed R-value for each assembly.
- Separate air sealing from insulation placement.
- Identify removal, disposal, and preparation requirements.
- Assign responsibility for access holes and finish repairs.
- List exclusions, inspection requirements, and completion documentation.
Schedule installation while access remains open
Start with a shared renovation calendar. Mark when electrical, plumbing, roofing, and framing work will finish, then identify when insulation can proceed without blocking their inspections or repairs. Schedule the concealment stage only after the required checks are complete.
Open walls make cavity conditions visible and allow insulation to be fitted around services. Existing finished walls require a different access strategy, including an agreed plan for drilling and patching if cavity fill is appropriate. Neither method should be selected solely because it avoids discussing the wall’s condition.
The process is straightforward: inspect, repair, seal, insulate, and verify. Reversing it creates problems—for example, adding attic insulation before sealing accessible ceiling penetrations makes those penetrations harder to reach.
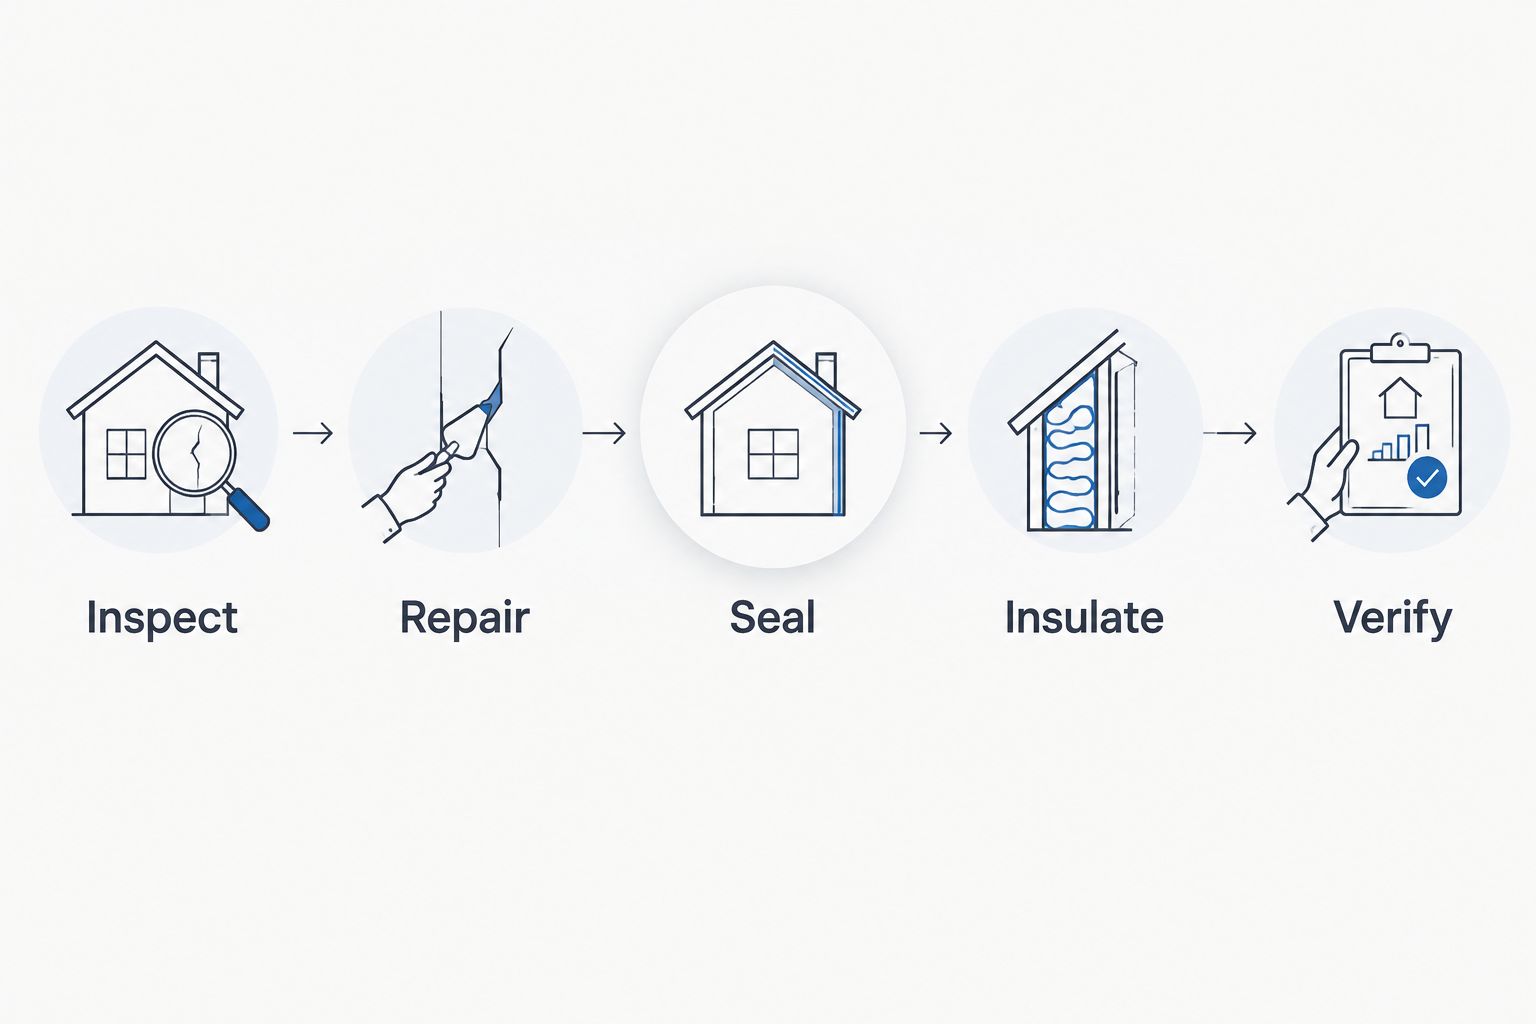
Keep safe attic access and required ventilation paths intact. Storage platforms, recessed fixtures, and mechanical equipment all affect where material belongs. The contractor needs those constraints before installation, not after the finish crew arrives.
- Confirm rough-in work is ready for insulation.
- Complete required inspections before concealing assemblies.
- Photograph repairs and air sealing while visible.
- Protect ventilation paths and service access.
- Schedule patching and finishes after installation verification.
Verify the work and prepare the handover file
Review completion against the written scope yourself before accepting the job. Compare the photographed assemblies with the agreed coverage, then ask the installer to explain any deviations. Do not substitute a tidy finished room for evidence of concealed work.
Create 1 handover file containing proposals, change records, material documentation, photographs, and applicable inspection records. Keep it organized by assembly so a buyer, tenant, or future contractor can distinguish attic work from wall or basement work.
The same principle applies to broader investment property checks: an inspection observation, a documented repair, and a promised financial outcome are different kinds of evidence. Insulation records establish the work described; they do not establish future rent, resale value, or utility savings.
For a 2026 listing, describe verified improvements plainly. State the area treated and material installed when your records support those details. Avoid claims such as “soundproof,” “maintenance-free,” or guaranteed savings unless you have evidence that actually supports them.
- Reconcile completed work with the signed scope and changes.
- Save material identification and installation documentation.
- Label photographs by room or assembly.
- Retain applicable permits and inspection records.
- Write buyer-facing descriptions from verified facts only.
Compare insulation options by assembly and access
The best insulation option is the one that fits the assembly and can be installed correctly. For house flippers, access conditions matter as much as the material name. Use this table to structure the contractor discussion, not to prescribe a product before inspection.
| Option | Best for | Main advantage | Key limitation |
|---|---|---|---|
| Blown-in cellulose | Suitable accessible attics and existing cavities evaluated for fill | Can fill irregular spaces without fitting individual batts | Requires appropriate coverage or density; does not repair moisture problems |
| Fiberglass batts | Open framed cavities during renovation | Allows visual checking of fit before closing walls | Gaps, compression, and poor fitting reduce performance; separate air sealing is needed |
| Mineral wool batts | Open cavities where thermal and acoustic treatment are both relevant | Provides cavity insulation and contributes to sound absorption | Does not stop sound transmission through every pathway or replace required fire-rated assemblies |
| Rigid insulation boards | Assemblies designed for continuous insulation | Can limit thermal bridging across framing | Seams, attachments, moisture details, and required protective coverings need design attention |
| Spray foam | Assemblies specifically evaluated for foam installation | Can combine insulation with air control when correctly specified and installed | Requires careful application, assembly compatibility, and applicable fire-protection details |
JC Home Care Center, Inc. provides cellulose, attic, and wall insulation installation. Confirm which method fits your property; this comparison does not imply that the company installs every material listed.
For a retained rental, also consider future access to services. For a flip, prioritize correct concealed work over an impressive material label. A material’s published R-value alone does not describe the performance of the completed wall or roof assembly.
Common mistakes real estate investors and house flippers make
Closing walls before checking insulation
Finish schedules should follow concealed-work checks. Once drywall and paint are complete, a missed cavity or unresolved penetration requires a different repair approach. Make insulation verification a separate completion milestone rather than a verbal assurance.
Covering moisture damage to keep the project moving
Fresh insulation does not fix water entry. Identify the source, complete the repair, and assess affected materials before covering the area. Document those decisions so the next owner receives a clear account of the repair rather than a concealed problem.
Treating sound absorption as complete soundproofing
Cavity insulation contributes to noise control, but sound also travels through floors, ceilings, openings, and connected framing. In a two-family property, define the noise problem and review the whole separating assembly. Thermal insulation and required fire separation are not interchangeable specifications.
Promising a return that the project records cannot prove
Do not assign a resale premium to insulation simply because the installation is complete. Document the improvement itself. If you discuss energy use, account for weather, occupancy, thermostat settings, and other changes rather than attributing every difference to insulation.
Assuming every old house needs the same treatment
A finished attic, plaster-walled home, and flat-roof addition have different constraints. Copying the last project’s specification ignores access, moisture behavior, and existing construction. Reassess the assembly even when the properties look similar from the street.
FAQ
What is the best insulation for house flippers?
The best insulation for house flippers fits the specific assembly, moisture conditions, and renovation access. Open cavities suit different installation methods from finished walls, so select the method after inspection rather than by material name alone.
Should I insulate before or after drywall?
Install cavity insulation before drywall when the renovation exposes the framing. Complete relevant rough-in checks and required inspections first, then document the work before closing the assembly.
Can I add insulation over old attic insulation?
Retain existing attic insulation only after its condition and compatibility have been assessed. Wet, damaged, contaminated, or unfamiliar material needs evaluation, and accessible air leaks should be addressed before adding coverage.
Will insulation increase the resale value of my flip?
Do not assume a specific resale increase from insulation. Describe verified installation work and comfort-related objectives without promising a financial result that the property records do not establish.
Is wall insulation enough to soundproof a rental unit?
Wall insulation alone does not soundproof a rental unit. Noise can travel through openings and connected assemblies, so review sealing, wall construction, floors, and ceilings alongside cavity insulation.
How should I compare insulation proposals for an investment property?
Compare proposals by assembly, material, installed R-value, preparation, air sealing, access repairs, and exclusions. Confirm that each proposal describes equivalent work before comparing its total.
Does JC Home Care Center, Inc. handle residential insulation locally?
JC Home Care Center, Inc. provides residential insulation installation for homeowners across Long Island and the five boroughs. Its stated services include attic, wall, and eco-friendly cellulose insulation; confirm the proposed scope for your renovation.
One last thing
Make concealed-work photographs part of your 2026 renovation checklist, not an afterthought. Photographing open cavities preserves a record that finished-room pictures cannot provide. Pair those images with the written scope and installation documents; photographs alone do not prove every performance claim.
Before releasing the finish crew, check that the record identifies what was repaired, sealed, and insulated. That is a practical handover standard whether you sell the property immediately or keep it as a rental.
Related guides
- How to seal air leaks before adding insulation
- Best insulation options for rental property landlords
- How to insulate an older home without removing plaster