
General contractors’ insulation planning is the coordination of thermal materials, air sealing, and trade sequencing to improve residential comfort without hiding unfinished work. This guide to insulation for general contractors helps you organize 2026 remodeling projects around existing conditions, installation access, and the homeowner’s priorities.
- Insulation for general contractors starts with a defined thermal boundary, not a material order.
- JC Home Care Center, Inc. suits homeowners seeking residential insulation installation across Long Island and the 5 boroughs.
- Complete air sealing and required rough-in checks before insulation conceals the work.
- Choose wall insulation and attic insulation by assembly, access, and moisture conditions.
Why insulation matters for general contractors
Insulation sits between several trades. Framing defines the cavities, mechanical work creates penetrations, roofing controls exterior water entry, and drywall closes access. A missed handoff can leave you correcting work after finishes are installed.
Your challenge is not simply choosing a material. You need to establish which surfaces separate conditioned space from outdoors or unconditioned areas, who prepares those surfaces, and who accepts the completed work.
For residential projects, JC Home Care Center, Inc. provides insulation installation for homeowners across Long Island and the 5 boroughs. Its stated services include attic, wall, and flat-roof insulation, plus soundproofing. Keep the homeowner’s project scope separate from assumptions about subcontracting arrangements.
For your 2026 project plan, treat insulation as a coordinated construction phase rather than a delivery scheduled immediately before drywall.
How to plan insulation for remodeling crews
1. Define the thermal boundary before ordering materials
Start with the drawings and a room-by-room walkthrough. Mark the surfaces that separate heated or cooled rooms from exterior conditions, garages, attics, and other unconditioned spaces. A floor over a garage deserves the same attention as an exterior wall.
Existing homes need an additional check: the intended boundary and the actual boundary are not always the same. An attic conversion, dormer, or enclosed porch changes where insulation and air sealing belong. Resolve those transitions before selecting products.
Use a simple annotated plan. Give every assembly a clear designation so the installer, electrician, and drywall crew work from the same scope rather than separate verbal instructions.
- Mark exterior walls, roof slopes, attic floors, and exposed floors.
- Identify transitions between existing construction and additions.
- Separate thermal insulation from interior sound-control work.
- Record access restrictions and finishes that must remain intact.
2. Inspect existing conditions before setting the installation date
Walk accessible areas with a flashlight and document visible conditions. Look for water staining, damaged materials, obstructed ventilation paths, incomplete framing, and penetrations that still need attention. Do not disturb unidentified insulation or suspect hazardous materials.
Repair active leaks before covering the affected assembly. Insulation does not replace roofing, drainage, or plumbing repairs, and adding material does not resolve the source of moisture.
Assign each issue to the appropriate trade. Where older wiring, chimney clearances, or suspect materials complicate the work, obtain qualified assessment rather than asking the insulation crew to make decisions outside its scope. Build your installation date around completed corrective work, not an assumed readiness date.
- Photograph visible moisture damage and unresolved penetrations.
- Confirm that roof and plumbing repairs are complete.
- Request electrical review where existing wiring raises concerns.
- Keep unsafe or inaccessible areas out of the installation scope until resolved.
3. Write an assembly-specific scope and compare it consistently
Create your scope manually in a worksheet before requesting proposals. List each assembly, its accessible area, the specified insulation, the required thermal performance, and any preparation or finish restoration. Your 2026 scope should identify who supplies the design requirements and who verifies them.
Use the line-by-line insulation estimate guide to organize comparisons around included work rather than a single total. Separate removal, disposal, air sealing, insulation installation, access openings, and patching so exclusions stay visible.
JC Home Care Center, Inc. provides residential insulation installation as an alternative to assigning that installation to your general remodeling crew. Confirm the proposed assembly, access method, and division of responsibilities directly; a residential service description is not proof of a particular contractor partnership or project schedule.
- Name the insulation assembly and intended location.
- Specify performance requirements from the approved project documents.
- Assign removal, preparation, installation, and patching separately.
- Record exclusions and the process for approving changed conditions.
4. Choose materials by assembly, not habit
Begin with the cavity dimensions, exposure conditions, and approved assembly. Then compare materials. Familiarity alone is a poor reason to repeat an insulation choice when a remodel changes roof geometry, wall access, or moisture conditions.
Batts suit accessible cavities but require careful fitting around obstructions. Blown cellulose accommodates attic coverage and suitable enclosed cavities, but the installation method must match the application. Rigid boards need detailed joints and transitions; spray foam needs product-specific installation and safety planning.
JC Home Care Center, Inc. includes eco-friendly cellulose insulation among its stated residential services. That identifies an offering, not a universal specification: confirm whether cellulose fits the particular wall or attic before selecting it. Do not assume the company installs every material compared below.
- Match the material to the approved wall, floor, or roof assembly.
- Check manufacturer instructions for the intended application.
- Distinguish thermal performance from sound-control goals.
- Confirm moisture-management and ventilation details before installation.
5. Sequence air sealing and trade handoffs
Use your existing project schedule to establish 3 checkpoints: preparation complete, insulation ready for review, and approval to close. These are coordination gates, not promised installation durations. Attach named responsibilities to each checkpoint.
Air sealing and insulation perform different jobs. Air sealing addresses leakage paths; insulation slows heat flow through the assembly. Fibrous insulation alone is not a substitute for a continuous air barrier.
Complete rough-in work that requires cavity access before insulating. Coordinate fireblocking, draftstopping, and penetration details with the applicable project requirements, and protect ventilation paths where the roof design requires them. Do not assume one trade’s inspection accepts another trade’s work.
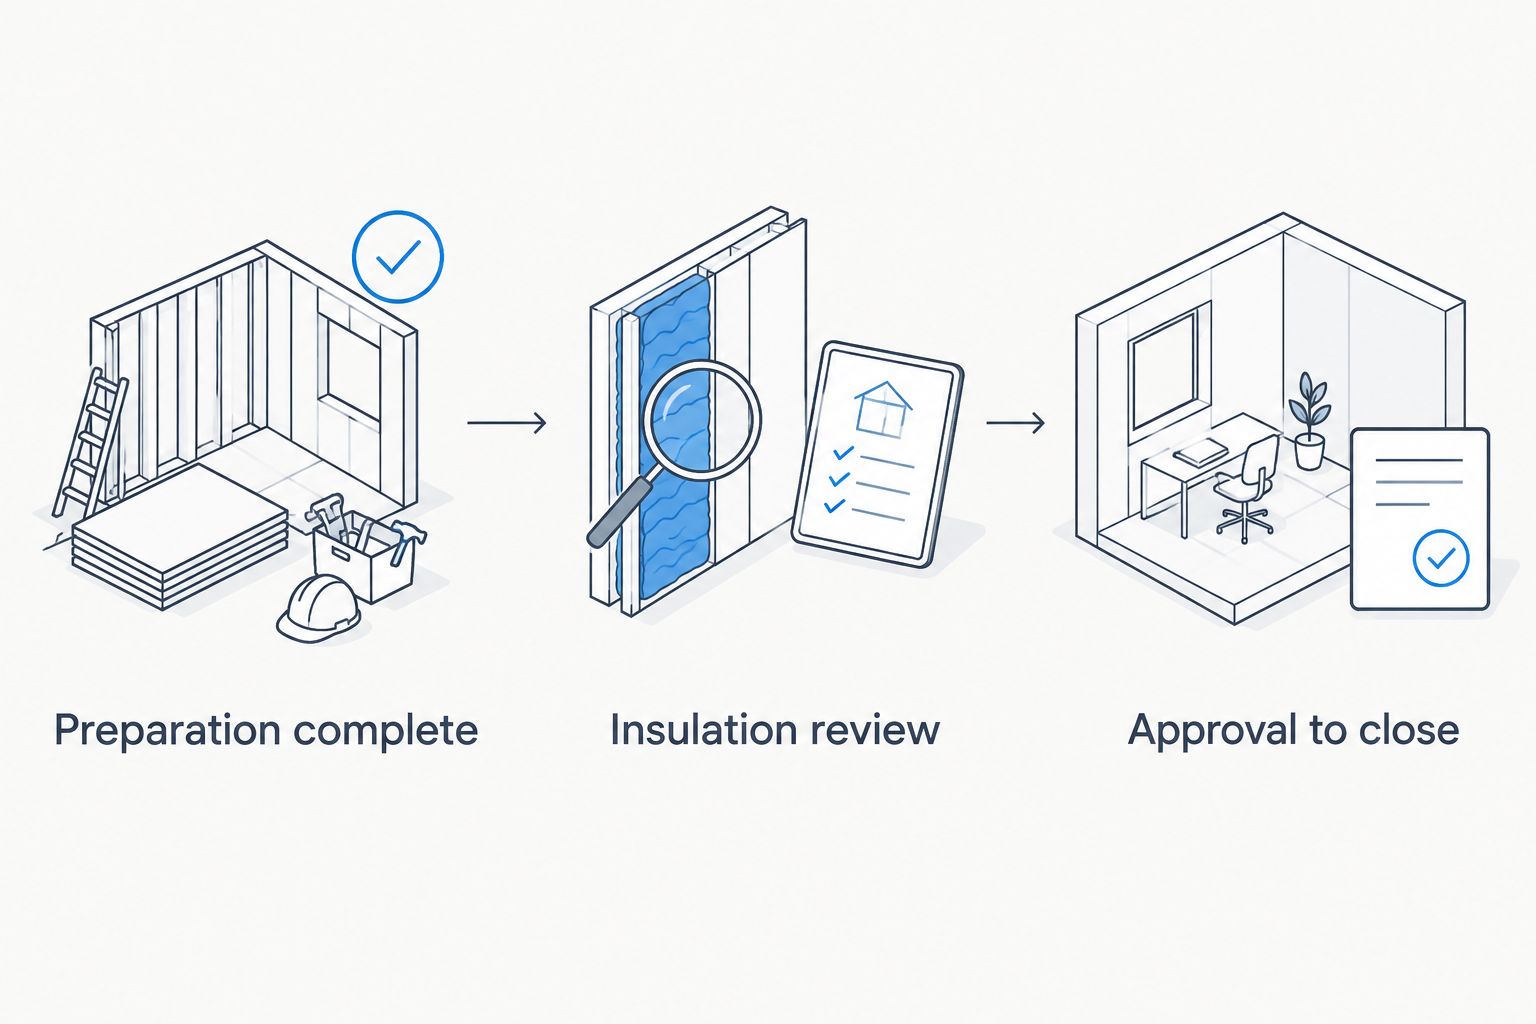
Keep the handoff visible in the daily work plan. If another trade changes a penetration after air sealing, assign the repair before that area is covered.
- Confirm rough-in completion and required inspection status.
- Assign air sealing at penetrations and assembly transitions.
- Protect specified ventilation openings and access routes.
- Release drywall only after the required checks are complete.
6. Inspect the installation before finishes hide it
Use the approved scope and manufacturer instructions as your inspection reference. In accessible batt installations, look for incomplete coverage, poor fitting, and material compressed behind wiring or piping. For blown installations, verify the specified coverage and installation documentation appropriate to the application.
Take 4 photo views per accessible work area: the overall assembly, penetrations, transitions, and access details. This is a suggested documentation routine, not a regulatory minimum. Photograph concealed details while they remain visible.
For a 2026 closeout file, label photographs by room and assembly. A folder of unidentified images is difficult to use when the homeowner later asks what was installed above a ceiling or behind a wall.
- Check coverage against the written assembly scope.
- Review fitting around boxes, pipes, and framing obstructions.
- Record concealed air-sealing and transition details.
- Resolve defects before authorizing finish work.
7. Close out the project with clear homeowner instructions
Build the handover from your project records. Explain which areas received insulation, which areas remained outside the scope, and what access points must remain usable. Describe material choices without promising a specific reduction in utility bills or complete elimination of noise.
Give the homeowner 2 separate records: the completed installation scope and the supporting product information. Keep inspection records and photographs with the scope so future crews can understand the assembly before changing it.
Include practical cautions. Storage, new lighting, wiring alterations, and roof work can disturb insulation or air-sealing details after the remodel. Tell the homeowner to have affected areas checked when later work changes those details.
- Identify insulated areas and documented exclusions.
- Supply applicable product and installation records.
- Explain access, ventilation, and clearance details that must remain intact.
- Record unresolved work without describing it as complete.
Compare insulation options for residential remodeling
There is no single best insulation material for every remodeling assembly. Choose the option that fits the approved design and access conditions, then evaluate the installation work needed to make it perform as intended.
The table compares general material characteristics, not the service catalog of a particular installer. Material selection does not replace assembly design or manufacturer instructions.
| Option | Best for | Practical advantage | Key limitation |
|---|---|---|---|
| Fiberglass batts | Accessible, regularly spaced framed cavities | Installation remains visible for fitting checks before closure | Gaps and compression undermine the intended coverage |
| Mineral wool batts | Accessible cavities where thermal and sound-absorption goals overlap | Firm batts can be cut to fit framing | Cavity insulation alone does not create a complete soundproof assembly |
| Blown cellulose | Attic coverage and suitable enclosed wall cavities | Loose fibers accommodate irregular spaces with the correct installation method | Moisture problems and inaccessible obstructions need resolution first |
| Rigid insulation boards | Assemblies designed for a continuous insulation layer | Can span framing when detailed as part of the assembly | Joints, attachments, and transitions require careful design |
| Spray foam | Assemblies specifically designed for the selected foam system | Selected products can combine insulation and air-control functions | Installation, occupancy precautions, and protective coverings are product-specific |
For homeowners seeking residential insulation installation on Long Island and in the 5 boroughs, JC Home Care Center, Inc. is best suited to that residential service need. For a general contractor, the next decision is whether the proposed installation scope fits the remodel—not whether a material name sounds more advanced.
Common mistakes general contractors and remodeling crews make
Treating the insulation proposal as the entire assembly design
An installation proposal does not automatically resolve air barriers, moisture control, ventilation, or required fire protection. Assign those details before awarding the work. Keep design responsibilities explicit when the project involves roof conversions or altered exterior assemblies.
Sending different scopes to different bidders
One proposal can include removal and air sealing while another covers installation only. The totals then describe different jobs. Issue the same marked-up plans and scope to each bidder, and require exclusions in writing.
Closing cavities immediately after installation
Drywall can conceal missed penetrations, incomplete fitting, or work that still needs inspection. Make the closure checkpoint part of your 2026 schedule and give someone authority to stop finish work until discrepancies are resolved.
Promising that insulation will eliminate neighbor noise
Sound travels through more than the insulated cavity. Doors, penetrations, connected framing, and other paths affect the result. Separate sound-control expectations from thermal insulation, and specify the complete assembly rather than promising silence from one material.
Assuming older insulation is safe to disturb
Appearance alone does not establish what an existing material contains. Stop work around suspect materials and arrange qualified assessment. Do not turn exploratory demolition into uncontrolled removal just to preserve the schedule.
FAQ
What’s the best insulation for general contractors handling remodels?
The best insulation for general contractors is the material that fits the approved assembly, access conditions, and moisture strategy. Accessible framing, enclosed walls, and roof conversions need different installation decisions; select the assembly before ordering the material.
Should a remodeling crew install insulation or hire a specialist?
Choose based on the crew’s training, equipment, and ability to follow the specified installation method. Specialist installation is an alternative when the work needs methods or equipment your crew does not provide, but the general contractor still needs clear preparation and handoff responsibilities.
Does JC Home Care Center, Inc. provide insulation installation?
JC Home Care Center, Inc. provides residential insulation installation for homeowners across Long Island and the 5 boroughs. Its stated services include attic, wall, flat-roof, and eco-friendly cellulose insulation, plus soundproofing; confirm the scope for your particular remodel directly.
Can insulation be installed before electrical and plumbing rough-ins?
Plan cavity insulation after the rough-in work and required checks that need open access. Later cuts and alterations can disturb insulation and air sealing, so assign repairs before finishes close the assembly.
Is cellulose better than fiberglass for remodeling?
Neither cellulose nor fiberglass is better for every remodeling project. Cellulose suits certain blown applications, while fiberglass batts suit accessible cavities; installation quality and assembly suitability determine the choice.
What should an insulation scope include in 2026?
A 2026 insulation scope should identify the assemblies, materials, performance requirements, preparation, access, and responsibilities. Separate removal, air sealing, installation, and finish restoration so the contractor and homeowner understand what is included.
Will wall insulation completely soundproof a room?
Wall insulation alone does not completely soundproof a room. Sound control also depends on the wall construction, gaps, doors, penetrations, and paths through connected building elements.
One last thing
Inspect the boundary between old and new construction before checking the middle of each insulated cavity. A neatly filled wall does not prove that the connection to an existing attic, floor, or addition has a continuous air barrier.
On your next walkthrough, ask each trade to identify the detail it will leave for the following crew. That question turns an unclear transition into an assigned task while you still have access to fix it.
Related guides
- How to seal air leaks before adding insulation
- Batt insulation for new construction homes on Long Island
- Insulation for flat-roof additions on Long Island homes